
JIMS Timken Crankcase Bearing Install
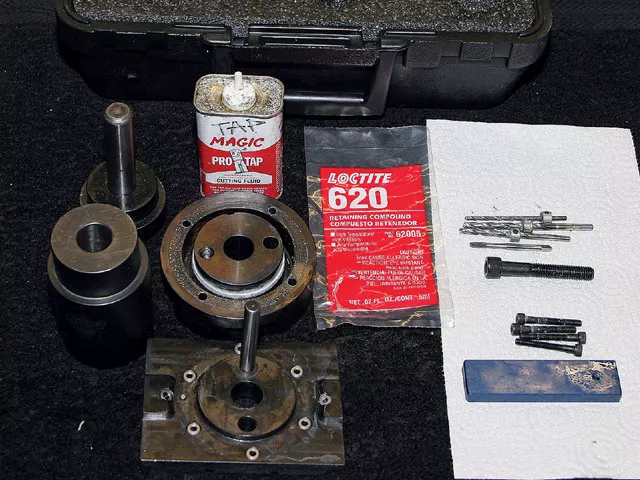
1. This is the JIMS Twin Cam Case Conversion Tool kit. The kit includes all the necessary bearing installer plates, drill jig, drills and stop collars, taps, tap guide, lubricant, Loctite, and storage case for installing the Timken Bearing Insert and tapered Timken bearing. One JIMS Timken Bearing Insert is included, but a Timken bearing must be purchased separately.
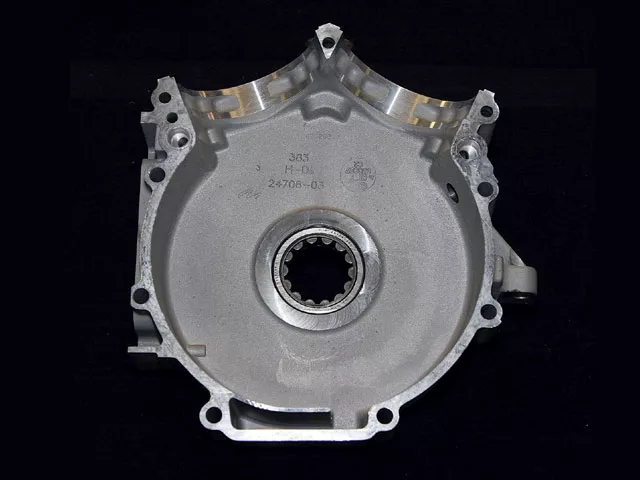
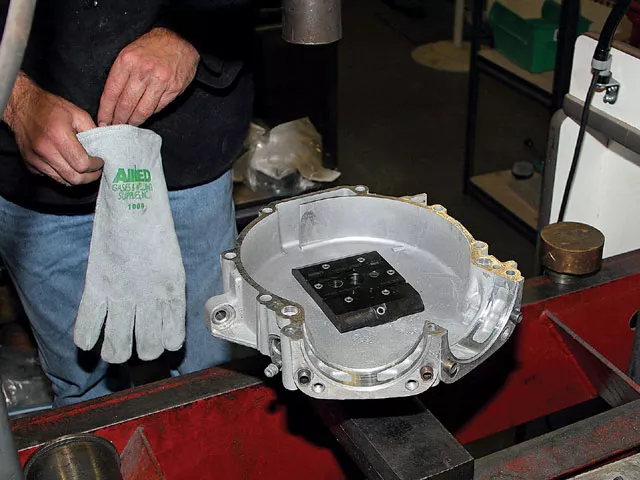
2. Shown is the left-side straight roller bearing that will be pressed out of this stock ’03 TC case before the Timken installation begins. Although this stock bearing shows no signs of damage, it is being replaced because a Timken bearing can better handle the power loads of a large-displacement engine.
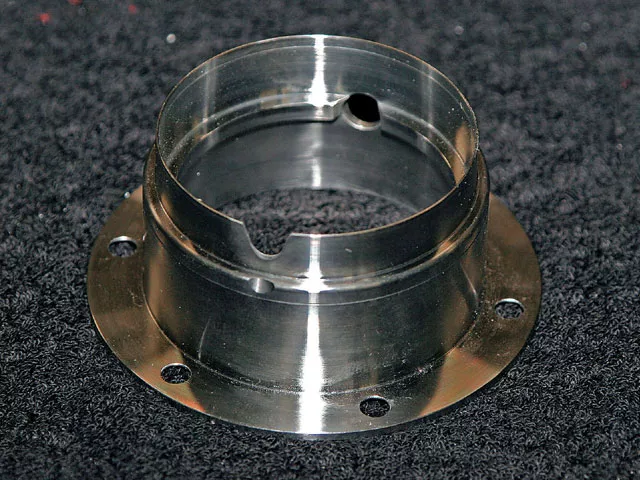
3. Here is the JIMS Timken Bearing Insert that will be installed in the left-side case to support the Timken bearing. The insert is precision-machined from aerospace chromoly steel and is several times stronger than the cast aluminum case material.
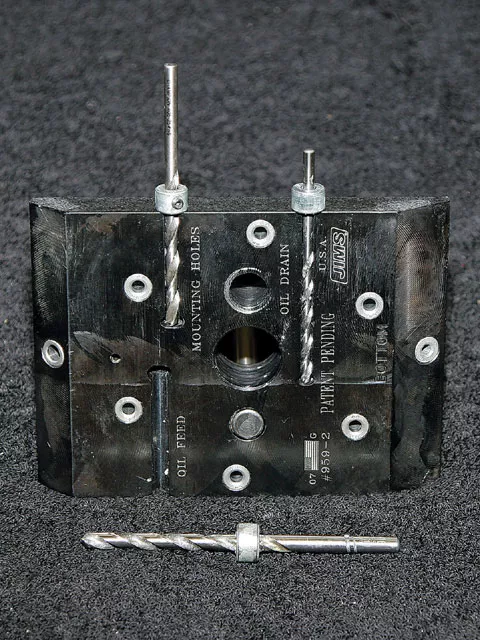
4. The rectangular Press Plate is first used to set the stop collars on each drill bit, so the eight required holes are drilled to a predetermined depth in the case.
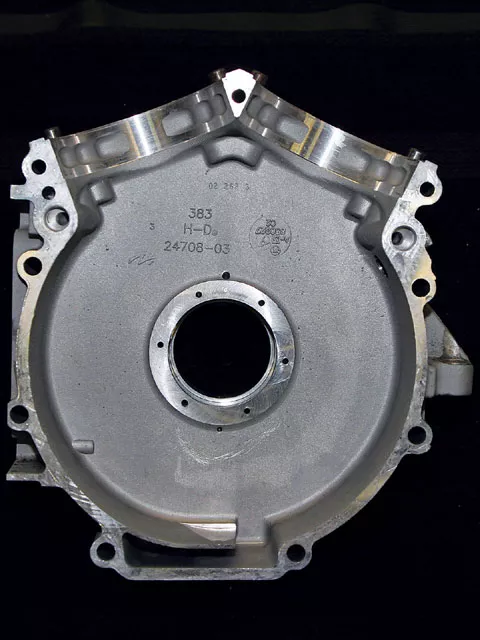
5. Once the stock straight roller bearing is removed from the case, the Bottom Locator Plate is fastened to the outside of the case with four cap screws.
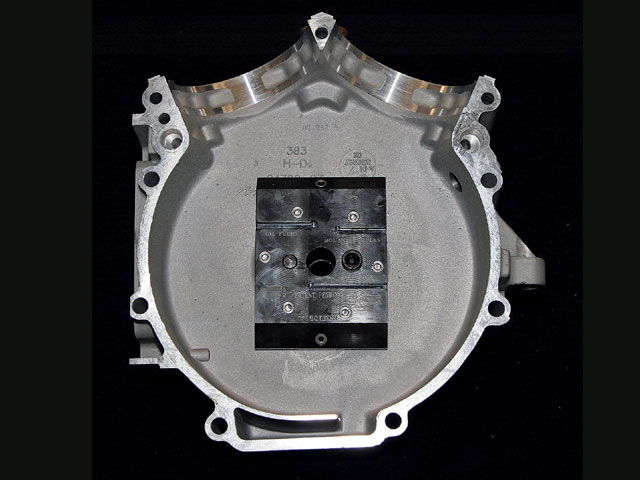
6. Now the rectangular Press Plate is installed on the inside of the case (flywheel cavity) and fastened to the Bottom Locator Plate. The Press Plate will pinpoint the location of the six mounting holes and two oil holes that will be hand-drilled.
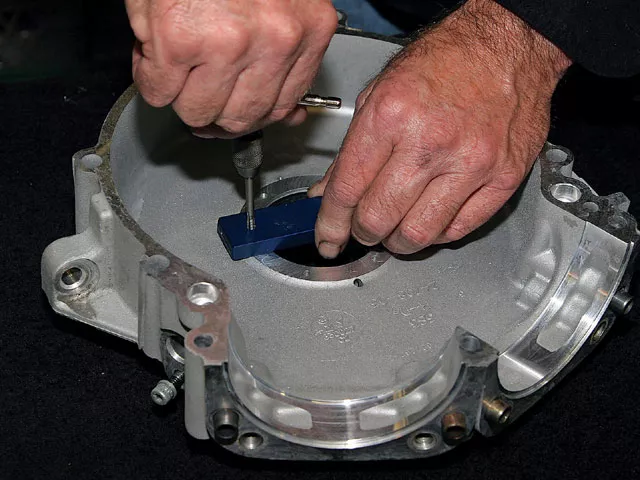
7. Once the two plates are fastened to the case, Charlie uses the included drill bits to hand drill six mounting holes around the case bearing bore for the steel bearing insert. He also drills one bearing oil feed hole (top) and one drain hole (bottom).
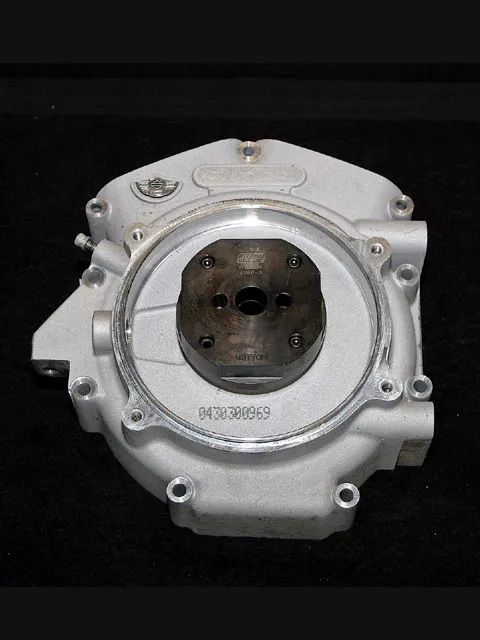
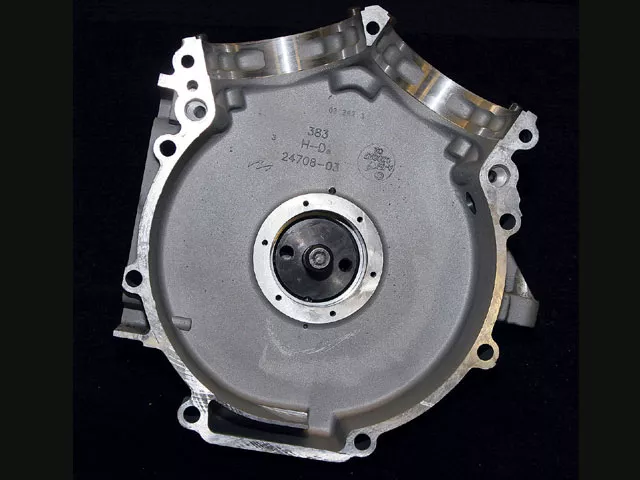
8. Here is the left case after the eight holes are drilled and the installer plates are removed. We now have an oil-fed hole at the top of the bearing bore, a drain hole at the bottom and six insert mounting holes.
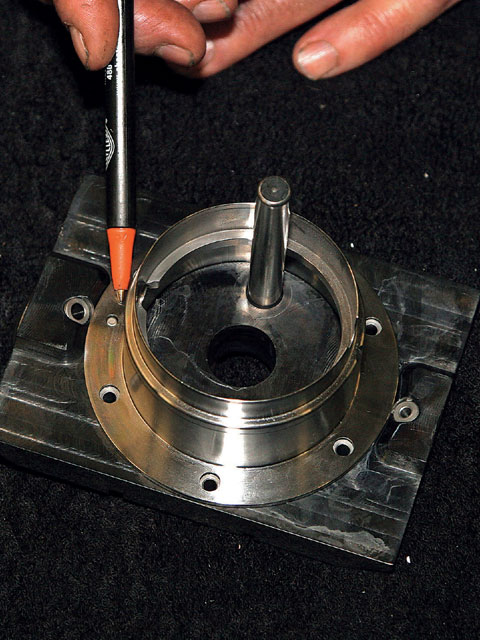
9. Now, Charlie taps the six insert mounting holes using the included tap and cutting lubricant. A tap guide is used to keep the tap perpendicular to the case. When tapping is finished, the case bearing bore and steel insert are thoroughly cleaned with solvent, so when it’s time to add threadlocker everything is clean.
10. The next six steps describe the installation of the chromoly steel insert into the case. First, the insert is positioned on the Press Plate, making sure the Press Plate’s 1/8-inch dowel pin is aligned with the 1/8-inch hole in the insert. The Press Plate and steel insert are then placed in a freezer to shrink the insert’s molecules for an easy press fit into the case bearing bore.
11. The Bottom Locator Plate is again fastened to the outside of the case using four cap screws.

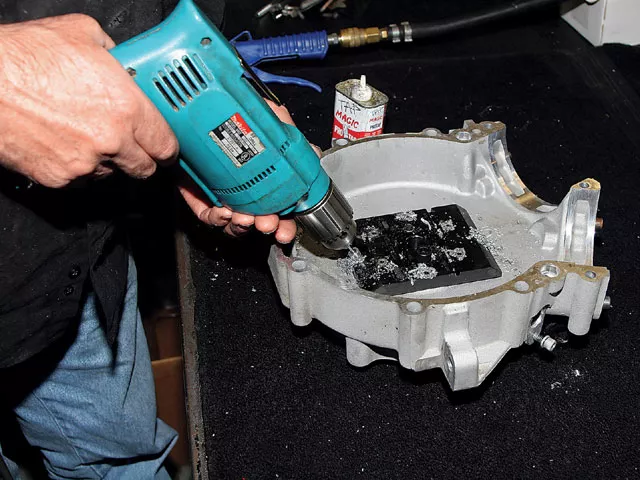
12. Now, Charlie heats the left case in an oven for several minutes, then quickly applies #620 Loctite to the case bearing bore.
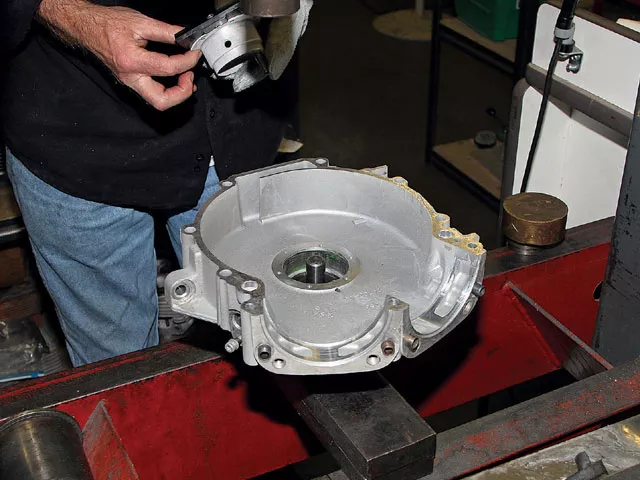
13. Next, the chilled Press Plate and insert are removed from the freezer and dropped into the heated case bearing bore.
14. As the insert is dropped into the case-bearing bore, the fitment of the two Press Plates will correctly align the insert’s six mounting holes and two oil holes with the case holes.
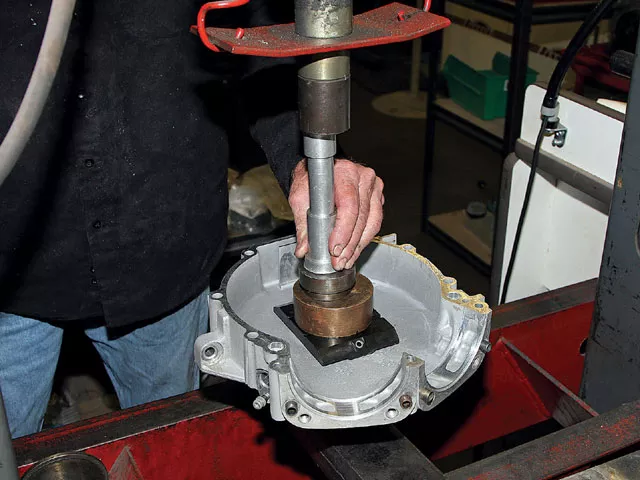
15. The case, steel insert and Press Plates are now placed in a hydraulic press and secured with light pressure so the insert doesn’t walk out of position during cooling.
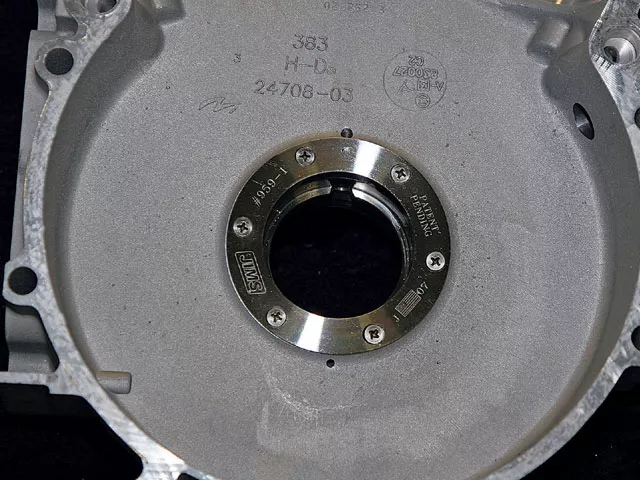
16. Once the case cools, the Locator Plates are removed. Next, threadlocker is applied to the six Philips screws used to secure the insert and the screws are tightened in a crisscross pattern to 30 in-lbs of torque. The installation of the JIMS Timken Bearing Insert in the case is now complete. Finally, the two Timken bearing races are pressed into the steel insert using tools included in the kit.
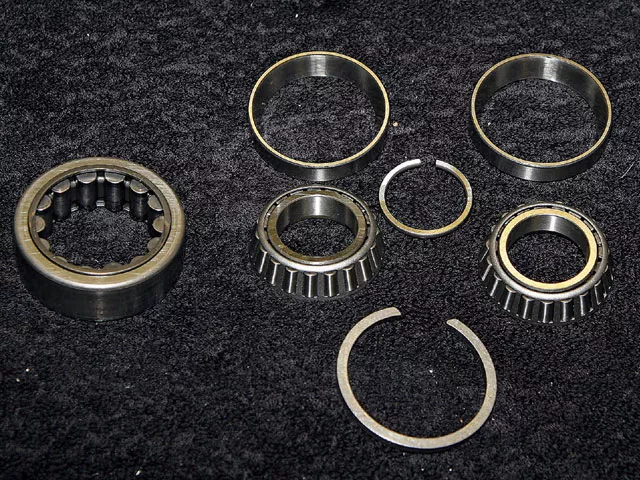
17. Shown is the stock straight roller bearing (left) and the multi-part tapered Timken bearing (right). The Timken consists of two bearing races (top right) and two tapered roller bearings (below right). The spacer in the middle is a shim designed to provide .001 to .005-inches of bearing endplay. Although variable thickness shims are available, every new Timken bearing comes as a matched set from the manufacturer with the correct shim to provide the .001 to .005-inches of endplay. Charlie prefers .004 to .005-inches of endplay. The bearing race retaining ring at the bottom right is not used because the JIMS Timken Insert includes a machined retaining ring as part of the insert. The two Timken bearing races (top right) are pressed into the JIMS steel insert using the Outer Race Installation Tool included with the Installation Kit.

18. For comparison, shown on the right is a tapered Timken bearing as it looks in assembled order; on the left is the stock straight roller bearing.
Building a solid bottom end should be foremost in one’s mind when hopping up any engine. Although the Twin Cam engine improved upon many of the Evolution’s shortfalls, there are still several major improvements you can make to the Twin Cam’s lower end that will afford you peace of mind and worry-free performance. For instance, if you have an ’03 or later Twin Cam, one worthwhile modification is converting the engine’s left-side case roller bearing to a more robust dual bearing setup. In this discussion, we will focus on replacing the Twin Cam’s left-side crankcase straight roller bearing with a tried-and-true tapered Timken roller bearing.
Similar to the Shovelhead and Evolution engines, the ’99 to ’02 Twin Cam engines were shipped with a dual tapered Timken roller bearing on the crankshaft’s left side. When set up correctly, the Timken bearing provides trouble-free service for even the largest and most powerful engines. For ’03 and later TC engines, the factory replaced the durable Timken with a straight roller bearing on the left-side sprocket shaft. While the straight roller bearing eliminates the need for setting bearing endplay, which significantly reduces labor costs during assembly, it cannot sufficiently handle the high loads generated by big bore/stroker engines designed for substantial horsepower output. Once an engine reaches approximately 100 horsepower or more, normal crankshaft flexing at high speed can fracture the straight roller bearing’s outer race. When that happens, broken bearing fragments fall into the flywheel cavity and end up circulating with the engine oil, destroying engine components and sometimes leading to catastrophic engine damage.
The fix for the bearing problem is to replace the straight roller bearing with a dual tapered Timken roller bearing. Since the Timken bearing is more tolerant of crankshaft flexing at high speed, it is used in aftermarket Twin Cam crankcases designed for high-performance and racing applications.
Installing a Timken bearing in a left-side TC case requires disassembling the engine, so this upgrade is best done when doing major performance upgrades such as installing a stroker crank or big-bore cylinders that require crankcase machining. Unfortunately, some riders have waited too long and have only considered a Timken conversion after their engine’s straight roller bearing disintegrated. Do yourself a favor-don’t follow in their footsteps. Nevertheless, it is prudent to install a left-side Timken bearing on all ’03 and later Twin Cam engines when doing major performance upgrades or the engine cases are disassembled. A Timken conversion can also be considered for stock 88ci or 96ci engines, so plan accordingly to avoid rolling the dice and losing sleep at night worrying about potential “bottom end blues.”
Previously, a Timken bearing install required time-consuming machining of the left-side crankcase. Recently, JIMS USA announced a Timken Crankcase Bearing Conversion Insert and an Installation Tool Kit, which eliminate the need for case machining. The Timken bearing insert easily installs directly into the stock Twin Cam left-half case. The sleeve is manufactured from aerospace-quality steel that is several times stronger than the aluminum case material that holds the standard bearing. The JIMS Installation Tool Kit includes everything needed to install the sleeve without any machining.
Charlie Lawlor of Short Block Charlie’s in Tempe, Arizona, has performed many Timken bearing conversions and invited HOT BIKE to follow along as he performs a Timken conversion using the JIMS Conversion kit on a 2003 Twin Cam A-motor that was being bored and stroked to 113 cubic inches.


